translation


Showing posts with label maker genius. Show all posts

03 July 2009

Mixed results for green IT goals


The Greening ICT Strategy requires 40% recycling by 2010

A majority of public sector employees do not know about environmentally friendly IT targets set out in government's Greening ICT Strategy.

The strategy calls for government IT to be carbon neutral by 2012, with office carbon emissions down 11.5% by 2011.

One of the commissioners of the report says there are scattered trends toward compliance with the strategy.

However, a survey of IT managers in the public sector showed 60% did not know there were any targets to aim for.

The report, titled "The Path to Green Government", was produced by environmental charity Global Action Plan and commissioned by networking giant Cisco.

It is estimated that information and communication technology (ICT) accounts for one-fifth of the Government's carbon emissions. The Greening ICT Strategy was intended to put the government in a leadership role in the sustainable use of ICT.

A large proportion of carbon emissions can be blamed on the manufacture of new equipment, so a principal focus of the initiative is to make the best use of existing equipment.

However, there is more to the plan once procurement is slimmed down, according to Cisco's head of public sector Neil Crockett.

"There is another, much bigger debate about how ICT can enable other things to happen, like building management, travel reduction, flexible working," he said.

'Pockets of excellence'

The Global Action Plan study was conducted by direct surveys of ICT managers in the public sector - local and national government, education, healthcare and so on - as well as a questionnaire in the magazine Computer Weekly.

Some 60% of respondents said that they were unaware of the Greening ICT Strategy, and among those who were aware, nearly one-third said that they had made no changes to their own ICT usage and procurement, and had no plans to make any such changes.

The problem, according to Global Action Plan director Trewin Restorick, is poor collaboration and knowledge sharing across the sector.
"What we saw was pockets of excellence, areas where the public sector is making both cash savings and carbon savings through smarter use of ICT," he told BBC News.

"But what we discovered was that those pockets of activity tended not to be part of a wider strategy within the public sector. They were very much piecemeal initiatives, which suggests they were being driven by keen individuals."

One straightforward route to knowledge sharing is that between IT managers and those who pay for the energy that the equipment consumes; more than two-thirds of respondents said that they were neither responsible for paying for the energy, nor did they see the bill.

Less than half had calculated their department's "carbon footprint".

"For an ICT manager, if they're not paying the energy bills - which are both volatile and going up - they have no interest in knowing what the long term impact of the product is," he said. "So you get managers buying stuff without thinking about utilising the assets they've got."

While the longer term goal to ameliorate the effects of climate change are a driving force for compliancy, in 2010 the Department for Environment Food and Rural Affairs' Carbon Reduction Commitment scheme will come into effect.

Under the scheme, each large private sector business and public sector organisation will tally up its carbon emissions, with a price tag of 12 pounds per tonne of emissions. Organisation will be placed into league tables; depending on where they fit, they will or will not get the money back.

The concern is that public sector money can, if the sector performs badly, be siphoned off into the private sector - a loss both in monetary and in ideological terms.

"'Health service money goes to Tesco's' is not a great headline," said Mr Restorick.

Groundswell

Catalina McGregor, government deputy champion of the Cabinet Office's CIO/CTO Council Green ICT Delivery Group, said a report from her office due for release in late August will comprehensively detail how each department is doing in unprecedented detail, from intelligence departments all the way to museums.

While its results are mixed, she told BBC News that signs of progress were widespread and that Mr Restorick's assessment may be a bit wide of the mark.

Lots of firms spend money to keep their servers cool

"I'm a little gun-shy to say that folk aren't working well together, because they are," she said. "It's very rare that something central is taken up by local [offices] to this extent on a voluntary basis. It's true that there are no 'big sticks', no incentives, no budgets; but there is a groundswell of support for the green ICT programme."

Rebecca Willis, vice chair of the government's green watchdog the Sustainable Development Commission, pointed out that despite commitments from government, signs of overall change were still lacking.

"The Greening ICT Strategy is an encouraging step towards making government IT more sustainable," she told BBC News.

"However, government electricity usage is continuing to rise, and it is likely that one of the big reasons for this is the proliferation of computers, laptops, chargers, lobby televisions and the air conditioning of server rooms. It's clear that ambition levels need to be raised."

13 October 2008

Creating a slide show with Windows Movie Maker

Creating a slide show with Windows Movie Maker - Windows XP comes with a small program called Windows Movie Maker that most photographers may not have realised could be a useful tool. Peter Bargh shows you how it can be used as great tool for creating fun slide shows.
Windows Movie Maker is primarily designed for movie editing, but we are going to show you a small and interesting technique to create really nice audio visuals from your photographs.

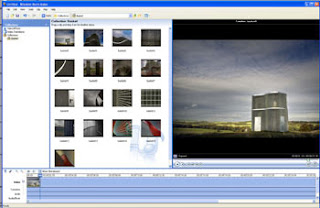
The program is accessed from the Windows Start menu's Accessories folder and when opened brings up a window with an area to drag and drop picture, video or music files which can be grouped in collections. The panel to the right which shows the work in progress and a strip below where you drag your images or videos and arrange them.

Right, so lets get started!


Step 1
Think of a theme. Mine is going to be Basket #7. Oxley Bank a small building like sculpture situated on a hill at the Yorkshire Sculpture Park created by Winter/Hörbelt.
I found this fascinating item with great shapes and took a series of pictures from inside and outside to show the fantastic wire frame sculpture at, hopefully, its best.

Step 2
Right click on the Collections icon on the far left panel to creates a sub menu collection, I'm calling mine Basket. Then make sure this collection is selected. If you cannot see the Collections view select Collections at the top next to Tasks.

Step 3
Go to File>Import into Collections (Ctrl I) and locate the pictures on your computer's hard drive. I like to prepared mine in advance, doing any necessary cropping and editing in Photoshop and place them in a folder. You can have any number of pictures, but I always found somewhere between 10 and 20 is enough to prevent your viewers from being bored (and it keeps the show short and download light), in this one I'm going to use 16.

Click on the first file icon and, while holding down the shift key, click on the last file to select all the files you want to import. Then, click import.
Thumbnails of all the pictures will appear in the Collection window. It doesn't matter what order they are in or how big the originals were.

Step 4


Click on the thumbnail of the picture that you want to appear first in your AV and drag it to the video strip at the bottom. Click on "Show Timeline" to view the time line if it's not already showing.

Then select your second picture, and drag that to the video strip. You will see that it butts up next to the first image. Repeat this with all the images in the order you want them to run. Now you will have a strip of 16 images and if you click on any one of them that image will appear on the panel on the right.

You can drag the left hand side of that panel left to increase the preview size or to the right to decrease the size, allowing more space for your collection thumbnails.

Step 5
On the base of the preview panel (right) there is a set of video player controls, click the rewind button to take your slide show back to the start, or you could click and drag the marker (blue line) back to the start of the images selected. If you now click the play button on the right hand panel you will see a basic slide show of all your images. Each has a default duration of 5 seconds. If you want a larger or shorter duration, go to Tools>Options and click on the Advance tab and set the desired number of seconds in the picture duration box. This has to be done before you drag the images from the collection to the video strip.

If you want a different duration once you've dragged them, you can click on the thumbnail in the video strip, then hover over the edge until you see the cursor change then drag it left to shorten the duration or right to lengthen it, you will see a red back and forwards arrow to help. The advantage of doing this is that it gives you the option of variation throughout the show.

Step 6


Currently the show just snaps from one frame to another but now its time to add a snazzy transition between each frame.

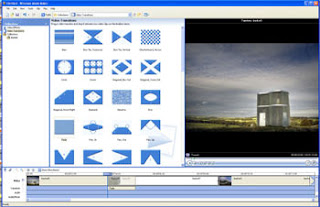
Go to Tools>Video Transitions and the collections window is replaced with a Transitions window. Here you will see a selection of icons demonstrating the type of effect you will can apply between frames. These range from simple fades and dissolves to page curls and sweeps through to more complex effects. We will go for the simple fade.
Click on the Fade icon and drag it roughly between two of your images on the video line. This will snap in between and a fade will automatically be added. Repeat this process adding a transition between each shot. If you decide you dont like one of the added effects just right click the white mark under the timeline to delete it.

Step 7
Next thing to do is add an audio soundtrack, if you are fortunate enough to be a musician you can add your own music, if not you will either need to buy some royalty free music or find a site that has some free downloads.

I've used Nocturnal Vigil (Pt.2) by Brannan Lane & Tom Larson BrannanLane.com from http://music.download.com website. Do a Google search for free mp3 downloads to find other websites that provide royalty free music.

Step 8
Once you have downloaded your music drag it to the collections window and then down to the audio/music strip at the bottom of window. Don't worry about it being longer than your slide collection we will trim it later.

Step 9
You could, at this stage, add video effects from the tools menu, these include aged film, pixellated, sepia tone and water colour which basically put a filter over the photograph. I dont personally like these as I prefer to do any artistic effect in my image-editing program before importing into the program. If you do decide to add them, but later decide you want to remove them, you will need to increase the size of the timeline using the plus ( ) icon enough to see video effect icon on the timeline (between slides), right click to delete.

Step 10
Now to add a show title. Click Tools > Title and Credits and choose whether to add a title at the beginning or in the timeline. I'm going to add mine to the first frame so I click on the first frame in the bottom strip and on "Add title on the selected clip". Enter the text you want to use. This should be the title of your show and maybe your name. You can set the way the text displays by clicking on the change the title animation link and also edit the font and its colour. When done click okay. Preview this using the play button in the right side window and adjust the length of the first frame and the position of the title in the bottom strip so that it all moves through smoothly.

Step 11


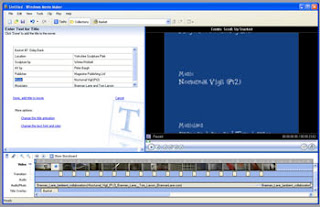
Click Tools > Title and Credits again and this time Add credits at the end. Now add your credits. I put the title again, the location, the producer, and the music and musians. It's like having a mini film credit list. Put the title in the top panel and then split the section below putting the whats in the left and the whos in the right. Click done. This will add a blue screen at the end with fancy scrolling credits.

Step 12
Last thing to do is cut the music strip by clicking the mouse at the end on the time line and click on the trim icon below the preview window on the right or from the menu Clip > Split (Ctrl L) and add a fade by right clicking on the Audio/Music strip at the bottom and choose Fade Out. Click on the unused end piece and press the delete button to remove it.

Step 13


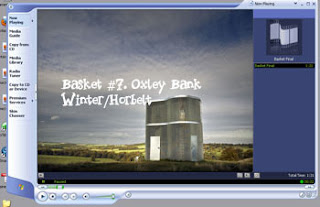
Play the movie by clicking on the arrow in the right hand preview and check the music works, the fades look good and the durations of each clip are ample. If not make more adjustments. If they are click on File > Save Movie File (Ctrl P) and choose a suitable playback format. I used High Quality Video (large) from the other settings drop down.which creates a 640x480pixel display with 25 frames per second.

Well I hope this tutorial makes creating Audio Visual shows an easy option in a program you may never have realised you had. Please rate the tutorial using our scoring system, also add a comment to say how easy or hard you found it to do and don't forget to submit your efforts to our download section.

The finished product which took about 15mins to create is below. Enjoy.

15 September 2008

Create a Vintage Film Style Video Using Photoshop CS3 Extended

please, click on pictures to see it on Natural size and For clearer vision


Photoshop CS3 Extended allows you to edit video and animations. Also, you can convert an existing video into a Smart Object and apply filters to it. This time we're going to give a video a vintage feel and mock it up inside an old TV screen.


Final Image Preview:

Before we get started, let's take a look at the video we'll be creating. Click the screenshot below to view the final video. As always, the layered Photoshop file is available via our PSDTUTS Plus membership.


Step 1:

Photoshop CS3 Extended has the useful feature of editing videos and animations directly inside of it. This time I'll show you some of the basics of video editing in Photoshop. Before getting started, you must know that Photoshop can edit any video as a Smart Object. This opens endless possibilities to create amazing outcomes to our videos by adding effects, filters, and more.

Let's begin, for this tutorial we'll start by creating a new blank document 640 pixels by 480 pixels. You can choose the Preset Film and Video and change the Width value. Go to Layers > Video Layers > New Video Layer From File, and search for any video in your computer.

I used this video, which was filmed about a year ago. It's of my friend Ariel rafting the Espíiritu Santo river here in Bolivia. As you can see, the video layer is on your Layers Palette right now. Convert it into a Smart Object (Right click on the layer miniature's name and click on Convert to Smart Object). Then name it "Video." Now, to set up your workspace, go to Window > Animation to show the Animation tools.


Step 2:


First, we'll edit the Levels of the "Video" layer. Click on Create a New Fill or Adjustment Layer > Levels in the Layers Palette. This will create a new Levels Adjustment Layer for the entire video. Use the following values.


setp 3:

Then add another Adjustment layer by clicking Create a New Fill or Adjustment Layer > Photo Filter. Set the color to #704302 and the Density to 100%. This way the "Video" layer turns into a nice sepia tone. Also, as you can see, each layer added turns into a new layer in the Animation window.


Step 4:

Here comes the fun! We're going to animate some objects in Photoshop. We're trying to get a vintage style video. First, we're going to create some random lines moving across the screen. Draw some vertical lines, three or four, using a 2px soft Brush, then delete some parts of the lines using a soft Eraser with the Opacity and Flow each set at 50%. Also, add all the layers into a new group named "New Video."


Step 5:


Go to the Animation (Timeline) window. Click on the arrow to explode the "Lines" layer. You'll see three rows: Position, Opacity, and Style. Each row can contain any number of Keyframes. When you create a keyframe you're setting a modify point for your layer.

Photoshop will create the motion between two keyframes. You can modify these three values on each of your layers as many times as you want. You can create a combination of several positions, opacity values, and layer styles over the timeline.

The movie has 20 seconds in length, the frame rate is 30 frames per second, so that means the movie has 600 frames. By default the timeline measure is in seconds. Below there's the control tools, there's a Play button, a Next button and Prev frame button. Also there's a slide to enlarge the size of your timeline viewing.

One of the most important tools in this window is the Current Time Indicator slider. It's the blue triangle over the timeline. By moving this slider you're selecting a unique frame-second to add a keyframe in. Armed with this knowledge, let's add some effects!


Step 6:


Drag the Current Time Indicator to 00:00f. Click the Time-vary stop watch (The tiny clock) of Position row. This will create a yellow rhombus over the Time line where the slider is located; This is a Keyframe. Now using the Move Tool (V) drag the "Lines" layer just a little to the right. This will be the first position of the motion.


Step 7:


Now we'll animate the Opacity of the "Lines" layer. Click on the Time-vary stop watch (The tiny clock) of the "Opacity" row. You'll see a gray rhombus appear. Then go to the Layers Palette and set "Lines" Opacity to 0%. By changing the opacity the gray rhombus will become yellow.


Step 8:


To create the second keyframe of animation drag the Current Time Indicator slider a few frames forward in the timeline. Then using the Move Tool (V), drag the invisible "Lines" a little bit to the right.

In the Layers Palette change the "Lines" Opacity to 75%. As you can see at the bottom of the image below, there's two more keyframes in both the "Position" and "Opacity" rows.

This is the hardest step of the entire process. If you miss this your first try, don't give up; just repeat the steps in order. By now you can use the Play button of the Animation window to start viewing the result: a motion fade in effect for the lines.


Step 9;


To complete the "Lines" sequence. Drag the Current Time Indicator slider just like in the previous step, a little bit forward. Then using the Move tool (V), drag the lines to the right, not to much, but no to few. Finally, set the "Lines" Opacity to 0% once again. If you click Play, you'll see a fade in + motion + fade out animation.


Step 10:


Now we have a three keyframes animation for one layer, and it's less than three seconds. So we need to repeat the lines animation across the time line. For this, go to Layers pallete and duplicate the "Lines" layer. Then go to Animation window and Shift + click all the keyframes of "Lines copy" layer. Once you have select them all, drag those frames forward, maybe near 10:00f.

Repeat the process, duplicate the "Lines copy" layer, select all the keyframes of "Lines copy 2" layer, and drag them forward. I did this just three times, though you could do it as many times you want. Try to not have two or more keyframes at the same time on your timeline, because the lines will look bold on the final video. Again, see the result by clicking the Play button.


Step 11:


To make the lines effect softer, convert each one of the "Lines" layers into a Smart Object. Then change their Opacities to 50%, 70%, and 50% respectively.


Step 12:


Create a new layer above the "Lines" layer and name it "Noise." Then press D to load the default colors. Go to Filter > Render > Clouds. Once you have your favorite clouds, go to Filter > Noise > Add Noise, and set the Amount to 30%. Also, set the Distribution as Uniform and select Monochromatic.


Step 13:

Set the "Noise" layer's Opacity to 25% and its Blending mode to Color Burn.


Step 14:


In the Animation window, drag the Current Time Indicator slider to 00:00f. Then click on the Clock Position row and free transform the "Noise" layer increasing the width as in the image below. Then drag the Current Time Indicator slider to 20:00f (the last frame) and move the "Noise" layer to the right. This way you'll get an animation for the noise.


Step 15:


Now if you want to add more grunge details to your video, add another layer of lines below the "Noise" layer, but this time make them more bold (Brush 3px). Follow the same steps for the basic lines (Steps 6 through 9). The differences are the following: Set a larger space between the keyframes and the first keyframe isn't in the 00:00f. If you want to get a better result, repeat this adding lines process three or four times.


Step 16;


Now just because we can we'll add some Subliminal text to our video. You can use it to add a signature to your work too. The steps are the same. First, create keyframes and change their layer's properties.

Draw any text into a new layer named "Subliminal image." Place this below the "Noise" layer. This time we'll animate only the Opacity, and for a very short time to make a subliminal image. Create a 0% opacity keyframe, then another 88%, and finally another at 0%.


Step 17:


Now we'll add a dark border to our video. Create a new layer above the "New Video" group, Ctrl + A to select all, Ctrl + Alt + D to Feather the Selection. Then set a 50px radius. Ctrl + Shift + I to inverse the selection. Then using the Fill tool and a black foreground, fill the selection.


Step 18:


Put everything into a new Group and name it "Full video" (I'm bad with the names).


Step 19:


Paste this image into a new layer above everything, and delete the screen. I used the Magic Wand Tool with a Tolerance of 50 for this.


Step 20:


Now convert all the "Full video" group into a Smart Object. If you want to edit the video later, Double-click on this layer. Now using the Warp tools distort the image to match the screen shape. I used some guides to make the work easier. Also, add a Drop Shadow to the TV layer. You can add more effects and layer styles if you want. I kept it simple this time.


Step 21:


To render your video go to File > Export > Render video. Select the folder and name the file. Choose Quick time Export (If this option is disabled you need to get Quick Time 7.4.X or higher). By clicking on Settings and then Adjustments you can select a lot of options for render quality. This time I'll use the default settings. Finally, click on Render.


Conclusion:


Our final movie file can be viewed here. Editing video using Photoshop is not always easy work, but you can get excellent results with a little bit of patience. Try this tutorial to add a signature to your videos or to add vintage effects to your next video blog post.


29 August 2008

Create a PowerPoint Design Template

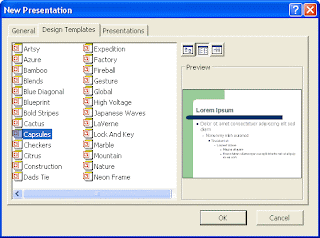
A Design Template is a pre-made slide or set of slides that you get when you click File > New in PowerPoint. For example, if you are designing something for the office, then your employer may have a Logo that needs to be added to each presentation. Instead of adding the Logo to each slide, you can set up a Design Template, and add the Logo to that. The template will then be available from the dialogue box when you click File > New.


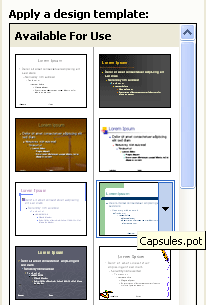
Or, if you have Power 2003, when you click From Design Template in the Task Pane. You'll then see the available designs appear:


What you're going to do now is to create your own Design Template that will appear on the dialogue box or on the Task Pane. But to get an idea of what you'll be doing, select any of the Design Templates, and click OK.

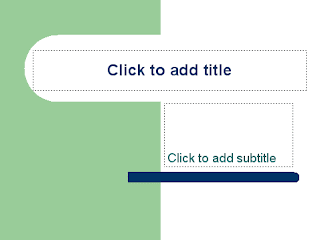
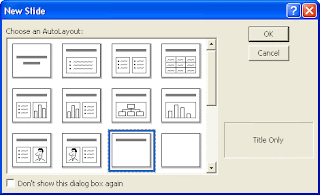
When you do, you'll see a New Slide dialogue box. Select the first one (Title slide). PowerPoint will give you the following new slide:


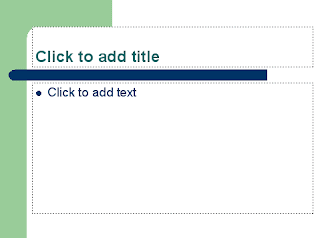
Insert another slide by clicking Insert > New Slide from the PowerPoint menu at the top. This time, select the Bulleted list. You'll then see the following slide appear:


The point about all this is that you don't have to do any work formatting the background, the fonts, or the text box positions. All that has been taken care of in the Design Template....


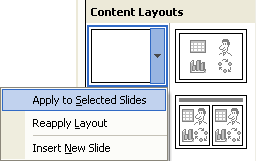
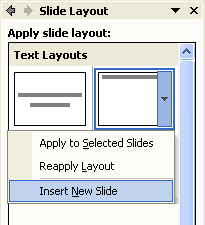
You've already created a Master Slide in a previous section of this course, so we won't go through everything again. But if you have a presentation open in PowerPoint, click File > Close. Then click File > New. In PowerPoint 2003, select Blank Presentation from the Task Pane on the right hand side. You'll get a slide with a bulleted list. Locate the blank slide in the Task Pane, and click the arrow:


From the menu, select Apply to Selected Slides, as in the image above.

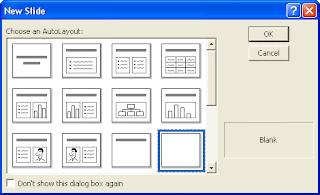
In PowerPoint 2000, you'll see the New Presentation screen again. Click on the General tab, then select Blank Presentation. Click OK, and you should see the New Slide dialogue box appear. Select the Blank slide, as in the image below:


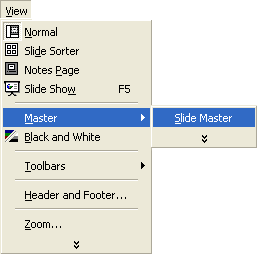
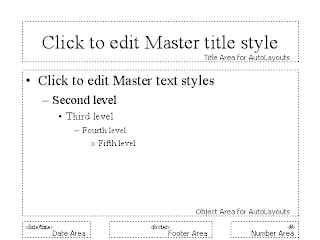
For both 2000 and 2003 users, once you have a blank slide, click View > Master > Slide Master from the menu bar at the top of PowerPoint:


You will be taken to the Master Slide view, and the slide should look like this:


From here, you can redesign any of the areas you see above. First, we'll add a background.

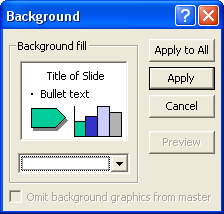
Click Format from the menu at the top of PowerPoint. From the Format menu, select Background. You'll see this small dialogue box appear:


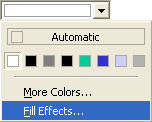
Click the black arrow on the dropdown list, and select Fill Effects:


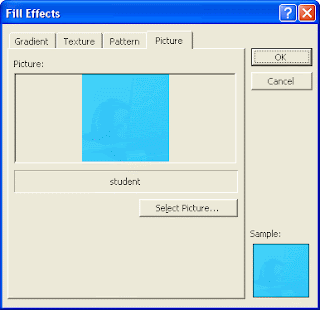
From the Fill Effects dialogue box that appears, click the Picture tab on the end. Browse for a picture on your computer. The one we're going to insert is amongst the file that you downloaded at the start of the book, in the folder called backgrounds.

Your dialogue box will then look like this:


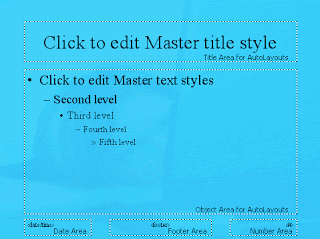
Click OK. When you get back to the small Background dialogue box, click Apply. Your Master Slide will then look like this:


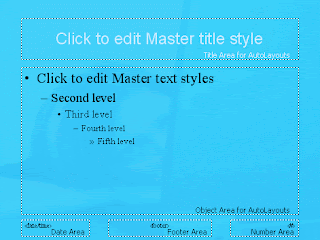
With the background in place, we can format the other areas. Highlight the text in the Title area "Click to edit Master title style". Change the Font to Arial, and the size to 36. Click Format > Font from the menu bar, and select a colour for the Font. We went for a light blue colour:


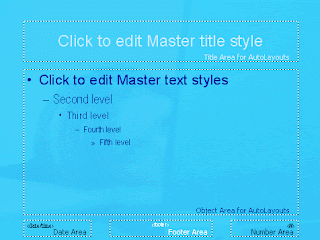
Format the rest of the AutoLayout areas in the same way. Don't forget the Footer area at the bottom. Format the slide number and date, if you prefer:


We went with a dark blue colour in the main text area, and Arial for the font. For the footer, the font was again Arial, but size 12 and in white.

If you want, you can resize and move any of the text areas. We did this before when setting up the Master Slide, so won't go through it again.

When you're happy with your Master Slide, click Close on the small dialogue box. Or click View > Normal from the menu bar at the top.

When you get back to the main screen, you should see the formerly white blank canvas you started with change to that of the background you added for the Master Slide.....


Now that you have formatted the Master Slide, you can add a Title slide. A lot of the time, you'd want this to be different from the Master.

Click Insert > New Slide from the menu bars at the top of PowerPoint. Insert a new Title slide:


PowerPoint 2000


PowerPoint 2003


You should then have two slides in PowerPoint. However, the Title slide will be the second slide, and we want this to be the first, because it will be the opening screen.

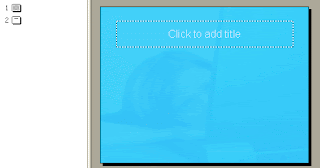
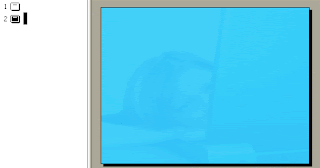
To move the Title slide to the start, click View > Slide Sorter from the menu bar. In Slide Sorter view, click on slide 2. Hold down your left mouse button and drag it to before slide 1. Then click View > Normal to get back to the main PowerPoint screen. In Outline View on the left, click on Slide 1. This should now be your Title slide. Click on Slide 2 and it should be blank, with just the background. Here's what your slide 1 should look like:


And here's the second slide:


So our Design template has two slides in it so far - a Tile slide, and a Master Slide. (Although the Master Slide is blank in our presentation, when you save it as a Design Template, it will retain all the formatting you did in Master Slide view.)

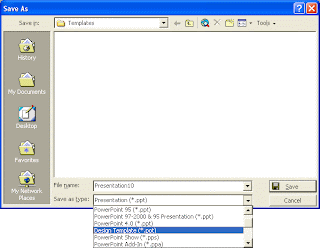
We can now save this as a Design Template. From the PowerPoint menu bar at the top, click File > Saves As. From the Save As box, select Design Template from Save as type:


Type a name for your template, and click Save.

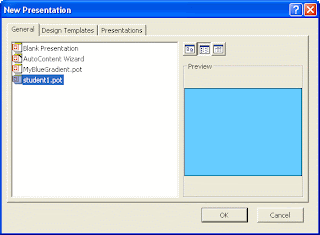
Once your design template is saved, you can create a new PowerPoint Presentation with all the formatting already in place. To test it out, click File > New. Your presentation will be on the General tab in PowerPoint 2000, and on the Task Pane in PowerPoint 2003.

In the image below (2000), we have saved the design template with the name Student1 (notice that the file ending is .pot):


Click OK and your template will be loaded.

Creating a Design Template can save you a lot of time and effort, especially if you're creating PowerPoint presentations for work.

27 August 2008

How to Build Your Own Bike


Once you have gotten the cycling fever, you might want to build your bicycle from start to finish. This is a fun, but can be expensive process depending on your taste and budget. There are custom builders who can take your measurements and preferences to build your bicycle, but it is not half as fun or satisfying as building your bicycle. This article will detail a process for selecting the components and assembling them in to a custom built by you bicycle
.................................................
Things You’ll Need:

* Bicycle frame
* Component group
* Saddle, seat post, handlebars, pedals, bar tape
* Wheels and tires
* Bicycle Computer/heart rate monitor
* Bicycle specific tools if you assemble

Assembling the parts:

Deciding to build your own bicycle is just the first decision you will make. There are dozens of decisions you will have to make about the frame, style of bicycle, components and fit. You can take a couple of initial routes at this point. You can do the research the research into the components, which in some cases is part of the fun. The other path is to sit down with a local bicycle dealer to seek their advice and help buying the parts. The advantage of doing the research yourself is that you are not limited to the parts or bicycles a local bicycle dealer can get for you. Most bicycle dealers carry a limited number of bicycle and part brands, but they will be able to build anything for you if you deliver them the parts. I would recommend independent research to decide what's best for you and trips to multiple bicycle shops to check out parts.


Start with the frame. What material are you going to use? Going the custom route means you want something that is distinctive usually, which means carbon fiber or titanium. Carbon fiber is lighter and allows for more design options. Titanium is usually stiffer and can mean heavier, but not by a lot. Local bicycle publications can be a good place to shop for a frame. Usually someone selling a frame only is trading up themselves so you can get something more exotic for a good price. There are also online retailers that will sell you a frame only or a frame and the component parts you want. Make sure you have the right to return a used frame if you go that route and that you inspect if very carefully before accepting it.


Next is the component or build kit. There are three primary makers of bicycle components: Shimano, Campagnolo and SRAM. All have their characteristics that make their products unique and have a range of products to fit any budget. This is an area where new parts are essential. The difference in new vs. used is usually not a great deal of money, so new is the way to go. There are links at the bottom for each of the component manufacturers so you can start your research. The parts you will get from a component group are: both dérailleurs, brakes, shifters or controllers, crankset (crank and bottom bracket) and chain.


Wheels are next. It you have a budget of "X", then wheels should be nearly 1/2 of that budget because they make the biggest difference in performance other than overall weight and the frame. The type of wheels you select are dependent on a few factors. First, which component group did you select? Shimano and SRAM use one kind of freewheel-rear wheel and Campagnolo uses another-this is due to the hub set up. There are also some brands that are exclusive to that set up and there are some manufacturers that will make both types, but it is a factor. Next factor is what type of riding are you going to be doing? Triathlons could mean one type of wheel set or lots of climbing could be another kind of wheel set. Aero wheels are popular now and have higher performance characteristics, but also could be significantly more expensive. What material would you like to have in the wheels. Carbon fiber or titanium will be lighter but more expensive. Carbon fiber wheels also will require carbon fiber safe brake pads. You also need to decide whether you want to use tubular or clincher wheels. Tubular roll faster, but require a professional, glue and time to change the tires. Clinchers are in general easily changed if you have a flat.


Tires are also part of the wheel selection process. Spend more money on tires and less on tubes. There is very little difference in tubes, but significant differences in tires. Is rolling speed or grip more important or a combination of both? The tires need to match the wheels with regard to clinchers or tubular.


Selecting a saddle is purely a matter of `fit. Some professional cyclists use the same saddle for years and refuse to change. As one columnist put it, it's you rear end so you'll know what is best. Try at least three saddles with different shapes or geometry to find the one that's right for you. You will also need a seat post that is compatible with your frame.


Clipless pedals are the way to go, but there are different shapes and styles which will also determine the cleats you need.


The last components you need are handlebars, handlebar tape and pedals. Handlebars with curved ends or drops, have the same basic shapes, but might have slight variances on grip.

Assembling your bicycle:

Assuming you decide to build the bicycle yourself, you will bicycle specific tools and a stand. The tools you will need to have at a minimum are: a complete set of allen wrenches, flat head and philips screw drivers, pedal wrench, cassette locking tool and chain whip, chain breaker, crank puller and bottom bracket tool, as well as a cable puller and cable cutting tool.

The easiest place to start is to install the tires and tubes on the wheels. Next put a small amount of grease on the rear wheel or free hub where it meets the cassette and install the cassette. Be careful to make sure all of the spacers and components are installed as intended.. Next use the cassette locking tool to secure it to the hub.

Next attach the seat post and saddle to the frame. You will need allen wrenches to accomplish this. You have the option of cutting the seat post to remove weight, but only to a certain point to ensure it will stay secure.

Secure the handle bar to the stem and the stem to the steering tube attached to the fork. If the head tube does not have a head set you will need to install one. You may need to install spacers to raise the handlebars to a comfortable height. The steering tube is another part that can be cut to the a right size if you wish.

Attach the shifters or controllers to the handlebars. You will use an allen wrench to snug them to the handlebars. You will probably want to adjust them slightly later in the process. The exact location is a matter of personal fit and comfort.

Attach the brakes through the frame. There is a front brake set and rear brake set. Brakes are secured to the frame with allen wrenches. Once installed move the adjustment lever all the way down.

Next install the crank and bottom bracket. There is are specific tools for this. First install the bottom bracket using a bottom bracket wrench. There are different types or wrenches depending on the type of bottom bracket and whether or not the bottom bracket has external cups or not. Next install the crankset. Again, there are specific tools that are needed depending on the crankset.

Next install the derailleurs. This is largely a matter of attaching them to the frame. They will need to be adjusted later, but install them on the frame.

Measure and cut the chain after running it through the deraileurs and chain ring. The best way to measure the chain is to use the large chain ring and the largest cassette cog then add 2-3 additional links. You will need a chain breaker to cut the excess chain links and finish the installation. There are articles on how to accomplish this on eHow.

Install the brake cables and then the derailleur cables. The controllers and and brakes will come with detailed instructions on the correct methods to install the cables. You will next want to adjust the high and low limit screws on the derailleurs to help ensure the are working properly.

The last step is to adjust the fit and tune the controls to make sure everything is comfortable and works as intended.There are bicycle fit articles on eHow to help you with this process.

Install the cables next start with the brake cables. Your brake and shifters will give you detailed instructions on the correct method.This is also the case with the derailleur cables. After you get them installed you will want to set the upper and lower limit screws to dial in more precise shifts.
genius khaled